©2021 Reporters Post24. All Rights Reserved.
Windows 11 has promised new features and one of the features is native Android emulation that will enable the users to run apps without installing a third-party app.
While this feature didn’t ship in the release build, it’s now in beta via the Windows Insider Program. The feature will use Amazon App Store for the Android apps, embedded inside the Microsoft Store, according to Android Authority.
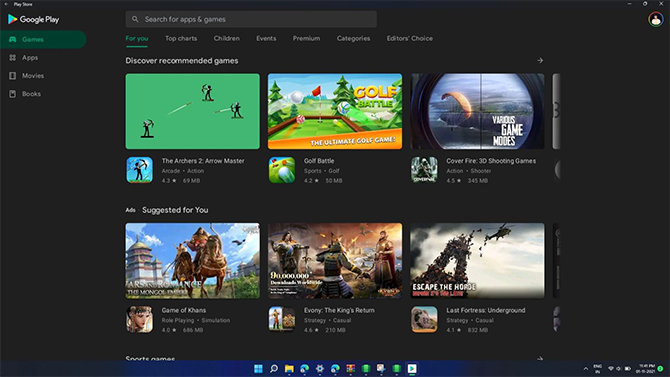
While the Amazon App Store is fine, the current selection of apps just contains 50 apps in total. Sideloading is possible, but Google Play Services are missing, which means many apps that rely on them will not work.
Getting ready for installation
Here are the steps to install Google Play Store on Windows 11, however, the Google Play service will not be required if you want to install some simple apps.
Before installing the Google Play Store, you need to get your system ready for the main components. It will take some time to download the necessary files before going ahead with the final installation process.
However, the users will need to only get APKs to the unmodified Windows Android Subsystem, according to the given method, if they want to install some simple apps.
The method was provided by a software tinkerer ADeltaX in a detailed video. A simpler implementation of the method comes from Yujinchang08 on Github which includes automation for some of the parts.
Those going to install the Google Play Store will need to meet the minimum system requirements, as well as be on the latest Windows 11 beta for this to work.
According to Android Authority, the method will modify the Windows Subsystem for Android and replace the kernel with a modified one that is risky and may result in loss of data, or potentially, even damage to hardware.
Uninstall Windows Subsystem for Android and enable Developer Mode
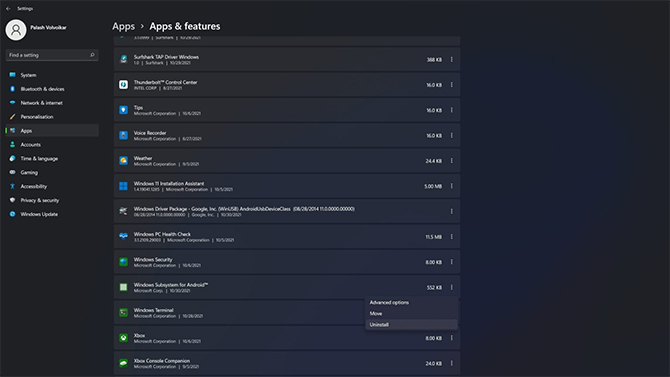
- Head over to the Settings app in Windows 11. Click on the Apps tab from the left pane.
- Click on Apps & features. It should be the first tab in the Apps section.
- Scroll down to Windows Subsytem for Android in the apps list.
- Click on the three-dot menu, and click on Uninstall.
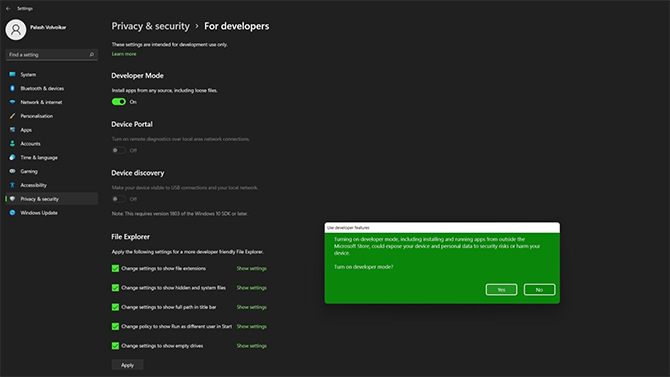
- Head over to the Privacy & security tab from the left pane.
- Click on the For developers tab under Security.
- Turn on Developer Mode.
- Click Yes when the prompt shows up.
Getting the modified Windows Subsystem for Android from Github
- Head over to Github and sign up for an account. Make sure you verify your email address and are signed in to Github.
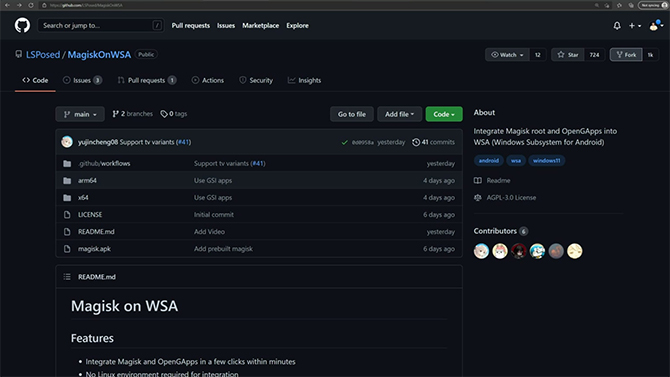
- Head over to the LSPosed MagiskOnWSA page on Github.
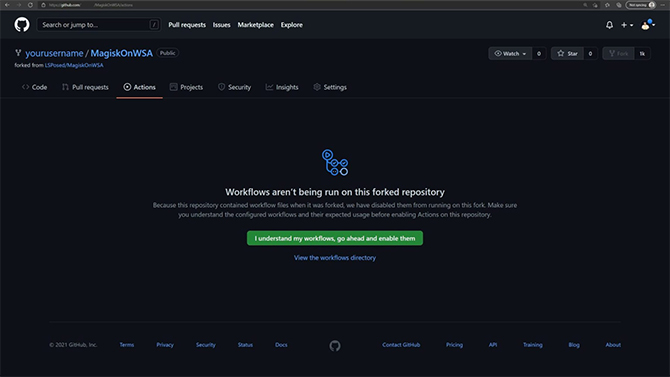
- Click on the Fork button in the top right corner. The process should take a few seconds and open up the forked copy in your account. If you lose it, you can head over to Your repositories by clicking on your profile icon.
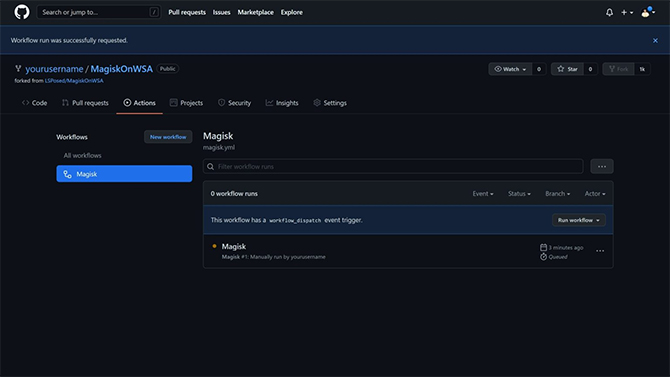
- Once on this page, click on the Actions tab. You’ll need to give one-time permission for workflows to run. Click on the green button that says I understand my workflows, go ahead and enable them.
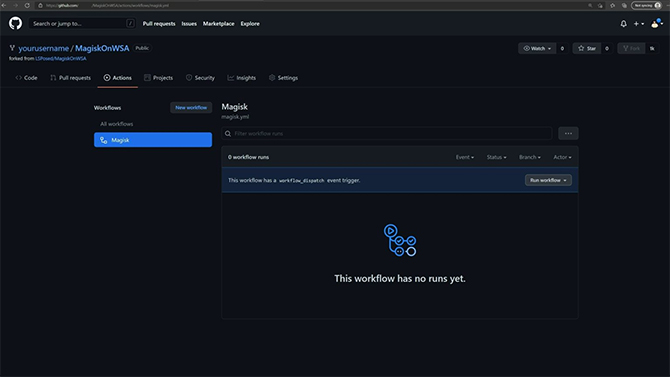
- In the left sidebar, click the Magisk workflow. Click on the Run workflow button.
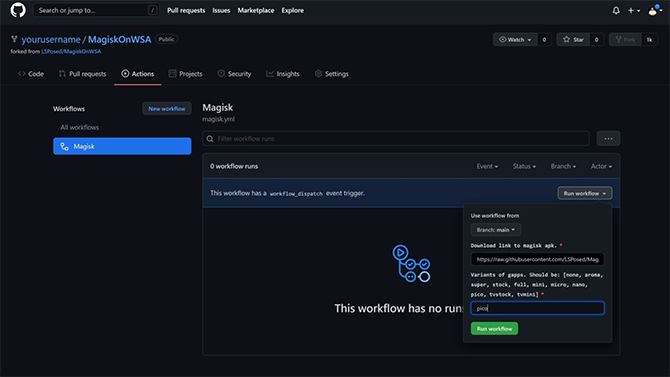
- You will get a pop-up. The Magisk APK link should automatically generate. For the Gapps variant, type in pico, or your preferred version name. Press the green Run workflow button.
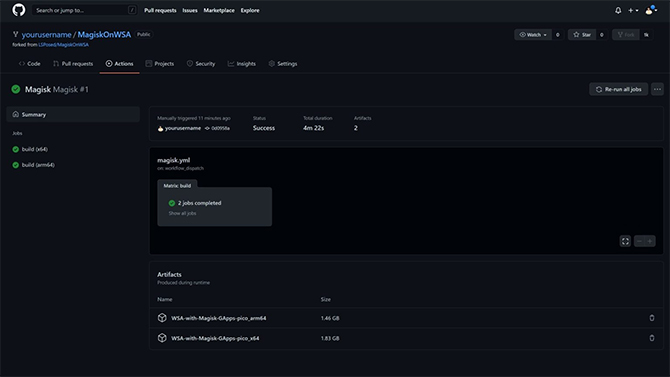
- The task will take a while to process, showing an orange status marker. It will move from Queued to In progress. After it’s completed, which should take about five minutes, the marker will turn into a green tick.
- Click on the Magisk task label. Scroll down to the Artifacts tab. You’ll have the Arm as well as x86 version of the modified WSA package ready for you. Click on your preferred version according to CPU type, to begin the download.
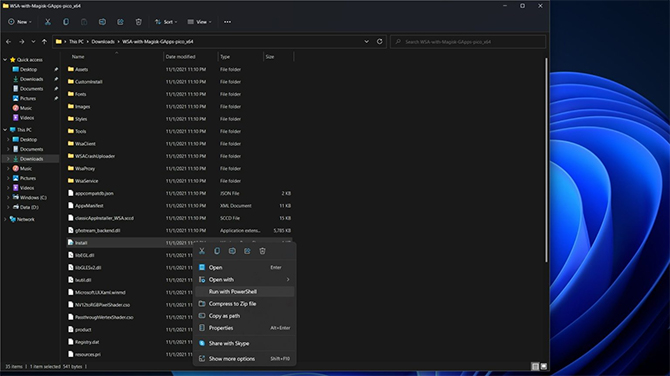
- The package will finish downloading in a bit. Note that this archive will have a smaller file size than the listed size, approximately about 800MB. Extract the downloaded file into a folder.
- Open the folder. Find the file named Install, right-click on it and click on Run with PowerShell. Click on Open when the security warning pops up. Also click on Run if PowerShell asks for permission.
- The installation should finish pretty quickly. If PowerShell prompts you to agree to any terms and conditions, make sure to do so in the window. Once finished, search for the Windows Subsystem for Android in the Start menu and open it.
- Turn on the Developer mode in the Subsystem settings. Click on Manage developer settings to start the subsystem, allow/deny diagnostic data when prompted, and click on Allow access when Windows Firewall requests it.
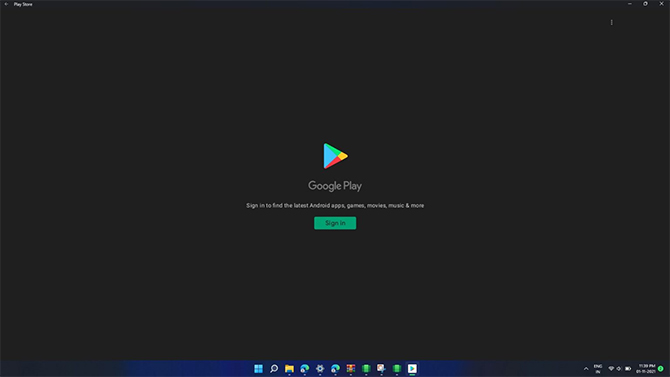
- It’ll take a few moments, but Google Play Store should now be installed on your Windows 11 system. Look it up in your Windows search, and click to open it. You will need to sign in to see and download apps from the Play Store.
Using Google Play Store on Windows 11
The rest of the usage will be similar to using Play Store on a phone or in an emulator. Just search for the app, and download it. Note that this is still a very early stage method, so you’re likely to run into issues. For example on our test machine, the text in some of the apps appears wobbly.
However, there’s great potential here. It will take a few months for a stable version to hit Windows 11 systems, but when it happens, it will outperform most emulators, if not the native version, then the developer-modded versions that we’ll see for sure.
Source: https://arynews.tv