©2021 Reporters Post24. All Rights Reserved.

Although the most popular JavaScript library for creating user interfaces is React, learning how to use this library as a Python developer can be a long and tough process.
While you can watch and read all the React tutorials possible to understand this library, it can be daunting if you don’t know the appropriate path or step-by-step approach.
This is because React uses a very different syntax and data structures than Python, which makes it difficult for Python developers to adapt to.
In this article, we’ll map out a road plan for getting started with React, as well as the core prerequisites for diving into React as a Python developer. We will also create a contact manager application with Flask (a Python web framework) and React as an example.
Before starting, you should have knowledge of HTML, CSS, JavaScript, and Python.
Intro to React
Facebook created and maintains the React JavaScript library for designing user interfaces. It has grown in popularity in recent years due to its ability to bring the power of reactive and declarative programming to the realm of frontend development.
React has also made it easier to consider user interface code and its programming paradigm encourages modular and reusable code.
It’s crucial to understand that React is nothing more than JavaScript.
React isn’t a standalone programming language or a domain-specific framework that takes years to understand. It has a simple API with just a few functions and concepts to master before you can use it to create web apps.
Let’s learn about some React concepts that will be important to understand in your journey of building web applications with React.
React components
Components are reusable chunks of code that are self-contained. They accomplish the same thing as JavaScript functions, except they act independently and return HTML.
They can be related to Python’s object-oriented programming (OOP) because both Python and JavaScript showcase the inheritance of data models.
However, in OOP, the data isn’t limited because any object can be created out of a Python class, unlike React components where data is limited to a set of other components. Also, React components can hold data for their own state, which is not the same for Python classes.
In React, components can break a web application into separate parts with distinct functions. For example, you can create a component for the header of the web application and another for the navigation menu, reusing it on other pages of your application.
Component architecture
In Python, there is no special hierarchy for how classes are used. However, React components work in a particular hierarchy.
We know that we can call and render components in other components. The component is called the child component, while the one that calls the child component is called the parent component. This is called a parent-child relationship.
You will learn later in this article how important knowing this architecture is to data transfer between components.
Class components
A class component is a component that inherits the features from React.Component class.
Below is an example of a class component:
class Header extends React.Component {
  render() {
    return <h2>Hello, I am a header!</h2>;
  }
}
In the class component above, we included the extends React.Component. This statement adds a React.Component inheritance to the component, giving it access to React.Component functionalities.
The component also requires the render() function, which returns HTML, to render the data in it.
The equivalent of the class component in Python is as follows:
class MyComponent(Component):
    def __init__(self):
        super().__init__()

    def render(self):
        return "Hello, I am a heder" ;
Functional components
A functional component, like a class component, returns HTML and operates similarly, but functional components can be constructed with significantly less code, are easier to grasp due to their simple syntax, and are favored in this tutorial:
function Header() {
  return <h2>Hello, I am a header!</h2>;
}
Below is the Python equivalent:
def Header() {
  return "Hello, I am a header!";
}
JSX
Although the <h1> and <div> tags look the same as HTML tags, they are not. JSX is a syntactic extension to JavaScript that contains these tags and was designed by the React team to enable inline HTML-like markup in JavaScript components.
These are similar to the Python Jinja templating engine.
There are a couple of key differences between JSX and HTML tags. The first is simply that the class keyword is now className.
Secondly, in HTML, we use strings like the following to define inline styles:
<h1 style="color: hotpink; font-size: 12px">Hello<h1>
However, in JSX, we utilize camel-cased objects:
<h1 style="color": "hotpink", "fontSize": "12px"> Hello </h1>
And finally, variables can be added in our JSX markup to be rendered by wrapping a variable in:
render() {
    var myText = 'Hello!';
    return (
          <h1>{myText}</h1>
    );
}
Other React classes can be referenced in addition to HTML elements like <h1> and <div>. In our src/demo/App.js, for example, we render the ExampleComponent component by accessing it as <ExampleComponent>.
Styling components
There are three ways to style your React components: using plain CSS, inline styles with JavaScript-style objects, or creating styled-components.
Using plain CSS to style
In the first way to style React components, which is using plain CSS, you must create a regular CSS file and import it into your React component. After importing it, you must add the class names for their corresponding HTML or JSX elements for the styles.
Below is an example for the CSS header style:
.header {
  padding: 60px;
  text-align: center;
  background: #1abc9c;
  color: white;
  font-size: 30px;
}
Then we have the header component:
import React from 'react';
import PropTypes from 'prop-types';
import './Header.css';
...
export default function Alert() {
  return(
    <div className="header">
      <h2>React Header</h2>
    </div>
  )
}
Using JavaScript-style objects
In the second method, you must remove the imported CSS file and create an object that has a padding of 20 and pass the object to the div using the style attribute:
import React from 'react';

function Header() {
  const wrapper = {
    padding: 20
  };

  return(
    <div style={wrapper}>
      <h1
    Header.
      </h1>
    </div>
  )
}

export default Header;
It’s worth noting that you don’t need to provide pixels as the padding unit. By default, React transforms this into a string of pixels. If you want a certain unit, write it as a string. So, for example, if you wanted the padding to be a percentage, it would be padding: `20%`.
Using styled-components
The third way to style your components is by creating styled-components. In this method, you must create styled objects, attach them, and wrap your JSX elements.
Styled-components is a development package for React and React Native. It allows you to use component-level styles in your apps and they integrate JavaScript with CSS using a technique known as CSS-in-JS.
Styled-components are built on tagged template literals, which implies that actual CSS code is written between backticks when styling components. Developers can reuse their CSS code from one project to the next as a result of this.
When utilizing styled-components, there is no need to map your built components to external CSS styles.
You can install styled-components using the npm command below:
npm i styled-components@4.1.3
Below is an example of how to use them in our React code:
import React from 'react';
import styled from 'styled-components';

// Button component that'll render an <a> tag with some styles
const Button = styled.a`
  background-colour: teal;
  color: white;
  padding: 1rem 2rem;
`
const App = () => {
  return (
    <Button>I am a button</Button>
  )
}
export default App;
You’ll see that when constructing a React functional component, you can specify the name of the component with the variable type and its name, as in const Button.
We imported styled above, which offers us the styled-components capabilities. Also, the a after styled signifies the anchor HTML element, <a>. When declaring a styled-component, you can use any HTML element like <div>, <h1>, or <p>.
States
A state object is integrated into React components. The state object is where you keep the component’s property values and the component rerenders when the state object changes:
import React, {useState} from "react";

const MyComponent = () => {
    const [value, setValue] = useState(1);
    return (
        <div>
            <p>{value}</p>
            <button onClick={() => setValue((value + 1))}>Increment Value</button>
        </div>
    );
};
In the code example above, we created a state value, which carries a value of 1, and setValue, which sets and updates the state value.
To do this, we used the useState Hook and setValue to update the value, adding 1 to it every time the button is clicked. This state will then update in the React DOM, which means the page doesn’t need to reload for the change to render.
Hooks
Hooks are functions that allow you to “hook” into React features like state and lifecycle functions. They are similar to decorators in Python that allow you to hook into a class or function and control its behavior.
To use Hooks, you must import them from the React library. They cannot be used with class components and may only be used at the top level of a component where the function attributes are declared, as seen in the code below:
import React, { useState } from "react";

function FavoriteColor() {
  const [color, setColor] = useState("red");

  return (
    <>
      <h1>My favorite color is {color}!</h1>
    </>
  );
}
As seen in the code above, the useState Hook is used at the top of the functional component, that is, before the return statement.
Hooks make managing states easier because they were built-in to carry out simple state management logic for you, which prevents you from wasting time on reinventing the wheel.
Some examples of Hooks are useState and useEffect.
Props
React props are similar to JavaScript function arguments and HTML attributes. They use the same syntax as HTML attributes to deliver props into a component:
<Header title="My react header" />;
Props are how you pass data between components and can be passed down from a parent component to a child component:
function House(props) {
  return <h2>I am a { props.type }!</h2>;
}

function Room() {
  return (
    <>
      <h1>Do you know my room number?</h1>
      <House type="duplex" />
    </>
  );
}
The parent component here is Room, while House is the child component. This is because the House component was called in the Room component, meaning a prop type was passed between them.
Passing states as props
You can also pass states as props between parent and child components:
<
function House(props) {
  return <h2>I am a { props.type }!</h2>;
}

function Room() {
  const [type, setType] = useState("Duplex");

  return (
    <>
      <h1>Do you know my room number?</h1>
      <House type={type} setType={setType} />
    </>
  );
}
In the code example above, we declare the state type, which carries the value "Duplex", and setType, which updates the state.
Then we can pass these states to the House component as props. We also added the props argument to the House component, which collects the states already passed. Finally, we render the data in the state using props.type.
Redux
When working in React, you will need to handle states across components in a complicated application. This problem is solved by Redux, a JavaScript package that aids in maintaining application states. Redux stores all of your states in a single source, and you can learn more about it in this tutorial.
WebPack
Webpack is a Javascript module bundler that allows you to keep dependencies as static files in your project so that you don’t have to. Loaders are also included with Webpack to aid in executing certain activities inside your project.
Server rendering
Learning server rendering will enable you to develop components on a server and render them as HTML in your browser; after all of the JavaScript modules download, React will take the stage.
This is one of React’s best features, and it can be utilized with any backend technology. You can learn about server rendering in this article.
Building the Flask and React applications
Let’s now build the Flask application to manage a database and data requests, which will be the backend for our React application. This section will demonstrate how to build a Python API that works with React, then build a React application that makes requests from your IT.
Flask installation
To install Flask, run the command below:
pip install flask
Next, run the following command to create the Flask project:
# create project directory
mkdir flaskapp

cd flaskapp
We can now create an app.py to add the Python code below:
from flask import Flask

app = Flask(__name__)

@app.route('/ping')
def ping():
    return ("hello world")


if __name__ == '__main__':
    app.run()
Setting up the Flask application
The Flask application will require you to install flask_sqlalchemy and flask_cors using the commands below:
pip install flask_sqlalchemy
pip install flask_cors
After installing the modules needed, import them and set them up. To do this, copy the code below in your app.py file:
import os
from flask import *
from flask_cors import CORS
from flask_sqlalchemy import SQLAlchemy

file_path = os.path.abspath(os.getcwd())+"\database.db"


app = Flask(__name__)

app.config['SQLALCHEMY_DATABASE_URI'] = 'sqlite:///'+file_path
app.config['SQLALCHEMY_TRACK_MODIFICATIONS'] = False
db = SQLAlchemy()
db.init_app(app)

@app.after_request
def after_request(response):
  response.headers.add('Access-Control-Allow-Headers', 'Content-Type,Authorization')
  response.headers.add('Access-Control-Allow-Methods', 'GET,PUT,POST,DELETE,OPTIONS')
  response.headers.add('Access-Control-Allow-Credentials', 'true')
  return response
Next, set up your database for the contact manager:
class ContactModel(db.Model):
    __tablename__ = "table"

    id = db.Column(db.Integer, primary_key=True)
    name = db.Column(db.String(), unique=True)

    def __init__(self, name):
        self.name = name

    def __repr__(self):
        return f"{self.name}"

@app.before_first_request
def create_table():
    db.create_all()
The ContactManager model creates the database tables and the @app.before_first_request decorator runs the build tables command that triggers the first time you use the Flask application.
Building the endpoints
In the code below, we can create, retrieve, and change endpoints for the contact manager application:
@app.route('/data/create' , methods = ['GET','POST'])
def create():
    if request.method == 'GET':
        return jsonify({"success": True, "message": "this is the create endpoint"}), 201

    if request.method == 'POST':
        request_data = json.loads(request.data)
        name = request_data['name']
        contact = ContactModel(name=name)
        db.session.add(contact)
        db.session.commit()
        return jsonify({"success": True, "message": "contact added successfully"}), 201

def contact_serializer(contact):
    return {'name': contact.name}

@app.route('/data')
def retrieveDataList():
    return jsonify([*map(contact_serializer, ContactModel.query.all())])


@app.route('/data/delete', methods=['GET','POST'])
def delete():
    request_data = json.loads(request.data)
    name = request_data['name']
    contact = ContactModel.query.filter_by(name=name).first()
    if request.method == 'POST':
        if contact:
            db.session.delete(contact)
            db.session.commit()
            return jsonify({"success": True, "message": "Contact deleted successfully"}), 201
        abort(404)

    return jsonify({"success": True}), 201
The create endpoint collects data under a POST request to create a contact in the database and the retrieve endpoint gets all the data stored in the database.
Finally, the delete endpoint receives data under a POST request. Ensure to check if this data exists in the database before proceeding to delete it. These three endpoints will be very useful when building your React application.
Building the React application
To begin building our React applications, we must first install React:
npm install react react-dom --save
To create your React project, enter the command below:
npx create-react-app contactmanager
Setting up the React application
In the React application you just created, locate the package.json file and add the API URL (http://127.0.0.1:5000/) to it as seen in the code sample below:
"name": "contactmanager",
  "version": "0.1.0",
  "private": true,
  "proxy":"http://127.0.0.1:5000/",
  "dependencies": {
    "@testing-library/jest-dom": "^5.16.1"
....
Next, create two folders named Components and Pages. The Components folder will carry all the application components while the Pages folder will carry the page components.
The App.js file
Next, let’s import and render the ContactPage component that carries all the other components for this application. Copy and paste the code in your App.js file:
import logo from './logo.svg';
import './App.css';
import {ContactPage} from './Pages/ContactPage';

function App() {
  return (
    <div className="App">
      <ContactPage />
    </div>
  );
}

export default App;
Building the components
In this section, we’ll build the components that make up the contact manager application.
The ContactPage component
Create a new file called ContactPage.js in the Pages folder and copy and paste the code below into it:
import React, {useState, useEffect} from 'react';
import {Card} from '../Components/Card';
import {Form} from '../Components/Form';

export const ContactPage = () => {
    const [contact, setContact] = useState([])
    const [addContact, setAddContact] = useState('')

    useEffect(()=> {
        fetch('/data').then(response => {
            if (response.ok){
                return response.json()
            }
        }).then(data => setContact(data))
    }, [])

    const handleFormChange = (inputValue) => {
        setAddContact(inputValue)
    }

    const handleFormSubmit = () => {
        fetch('/data/create', {
            method: 'POST',
            body: JSON.stringify({
                name:addContact
            }),
            headers: {
                "Content-type": "application/json; charset=UTF-8"
            }
        }).then(response => response.json()).then(message =>
            {console.log(message);
            getLatestContacts();
            setAddContact('')
            })

    }

    const deleteContact = (name) => {
        fetch('/data/delete', {
            method: 'POST',
            body: JSON.stringify({
                name:name
            }),
            headers: {
                "Content-type": "application/json; charset=UTF-8"
            }
        }).then(response => response.json()).then(message => {
            console.log(message);
            getLatestContacts()
            })

    }

    const getLatestContacts = () => {
        fetch('/data').then(response => {
            if(response.ok){
                return response.json()
            }
        }).then(data => setContact(data))
    }


    return (
        <>
        <Form userInput={addContact} onFormChange = {handleFormChange} onFormSubmit={handleFormSubmit}/>
        <Card listOfContacts={contact} onDelete={deleteContact}/>
        </>
    )
}
In the code above, we created the ContactPage component and rendered the Card and Form components in it.
Then, by creating a contact state and its setter, setContact, this will carry the contacts’ data. The addContact state and its setter, setAddContact, also carry the input for the data to add to the database.
Next, the useEffect Hook and the fetch method to retrieve data from the /data endpoint in the Flask application, setting the retrieved data to the current contact state. This ensures the retrieved data is the same as the data displayed on the application.
When creating a handleFormChange function, it sets the state of the addContact state to the current data in the input field. We can then pass handleFormChange as a prop to the Form component.
Next, the handleFormSubmit function sends data to the create endpoint in Flask to add new data to the database and clear the input field by setting the setAddContact state to an empty string while getting the latest data after the creation of the new contact using the getLatestContacts function.
This function also sets the contact state to the most current data after using the fetch method to retrieve data. We can then pass handleFormSubmit as a prop to the Form component.
And finally, the deleteContact function deletes contacts from the Flask database by making a request using the fetch method to the data/delete endpoint, followed by the getLatestContacts function to get the new data after the delete action.
We can then pass the deleteContact function and the contact state to the Card component.
The Card component
The Card component renders all the data retrieved from the Flask application database. To use the Card component, create a new file called Card.js in the components folder and copy and paste the code below into it:
import React from 'react';

export const Card = ({ listOfContacts, onDelete }) => {

    const handleDelete = (name) => {
        onDelete(name);
    }

    return(
        <>
        <h2>Contact List</h2>
        {listOfContacts.map(contact => {
            return(
                <ul key={contact.name}>
                    <li>
                        {contact.name}
                     <button onClick={() => handleDelete(contact.name)}> x </button>
                    </li>
                </ul>
            )
        })}
        </>
    )
}
By rendering each contact in a list using the map function to map the data in the listOfContact prop passed from the ContactPage, we can add a delete button to trigger the handleDelete function and pass the name of the particular contact to be deleted.
The handleDelete function then collects the name passed and calls the onDelete prop that was passed from the ContactPage component and carries out the same function as deleteContact.
With that, our contact list currently looks like the list below:

The Form component
The form component renders the form used to submit data to our application. To do this, create a new file called Form.js in the Components folder and copy and paste the code below:
import React from 'react';

export const Form = ({ userInput, onFormChange, onFormSubmit }) => {

    const handleChange = (event) => {
        onFormChange(event.target.value);
    }

    const handleSubmit = (event) => {
        event.preventDefault()
        onFormSubmit()
    }

    return(
        <>
        <h2>Add Contact</h2>
        <form onSubmit={handleSubmit}>
            <input type="text" required value={userInput} onChange={handleChange}></input>
            <input type="submit" ></input>
        </form>
        </>
    )
}
Here, the handleSubmit function is attached to the form, while the handleChange function is attached to the name input element.
The handleChange function triggers when we enter data into the HTML text input field, while the handleSubmit function triggers when the form is submitted. This is done by calling the prop functions passed from the ContactPage in handleChange and handleSubmit.
In handleChange, we called the onFormChange. prop, which performs the handleFormChange function in the ContactPage component, while in handleSubmit, we called the onFormChange. prop to perform the handleFormSubmit function.
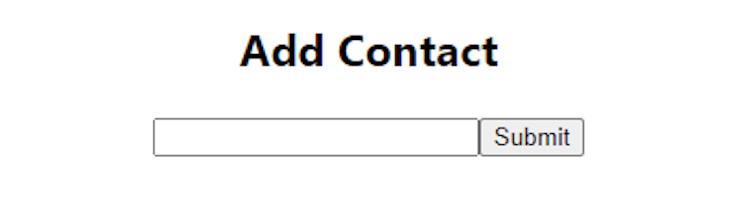
And here’s the final Add Contact form:
Conclusion
Finally, we have a working contact list that we can effectively add and delete contacts:

Both Python and React are excellent choices for creating a web application. When utilizing them, you’ll notice that several features, such as Python’s decorators and React Hooks, are identical.
Only a few changes in code syntax and data model/transfer principles exist, such as how functions are defined and how data in a React component is managed differently than data in a Python class.
As a Python developer, learning React is important when building the server-side of your web applications. Thanks for reading, and happy coding!!
Full visibility into production React apps
Debugging React applications can be difficult, especially when users experience issues that are hard to reproduce. If you’re interested in monitoring and tracking Redux state, automatically surfacing JavaScript errors, and tracking slow network requests and component load time, try LogRocket.  LogRocket is like a DVR for web and mobile apps, recording literally everything that happens on your React app. Instead of guessing why problems happen, you can aggregate and report on what state your application was in when an issue occurred. LogRocket also monitors your app’s performance, reporting with metrics like client CPU load, client memory usage, and more.
The LogRocket Redux middleware package adds an extra layer of visibility into your user sessions. LogRocket logs all actions and state from your Redux stores.
Modernize how you debug your React apps — start monitoring for free.
Source: https://blog.logrocket.com